Category Archives: PZ Conservation

The King James Bible is Finished!

The front board was reattached, after sewing back in the loose sections using an aerolinen flange backed with hahnemuhle. A piece of toned leather was then adhered to the inside of the spine, and to the boards. I was able to very slightly lift the original leather along the joint so that the new piece should slide underneath. Then the leather was turned in at head and tail.

There were a few more areas of paper repair to finish, and a bespoke corrugated board box lined with plastazote was made. The box included some small fragments of the text that I couldn’t find places for, as well as the documentation and handling guidelines.

Bible before treatment.

Bible before treatment.

Bible after treatment.

Bible after treatment.

Textblock after Treatment

Textblock after Treatment

Textblock before treatment.

Textblock before treatment.

Wooden Board Infilling pt. 2

So, I’ve found some spare wooden boards in the studio that have perfect woodworm holes to practice on.

I’ve also spoken with the Objects Conservator at The Royal Cornwall Institute – Laura Radcliffe about how best to go about the infills, she’s given me some good pointers, and I’ve followed her instructions with some changes or tweaks…

Area #1 to be filled. Before treatment.

Area #1 to be filled. Before treatment.

Area #2 to be filled. Before treatment.

Area #2 to be filled. Before treatment.

First of all, I’ve primed the area to be filled with the 10% Paraloid solution, by flooding the tunnels and holes, making sure all the walls are covered to prevent any of the infills seeping into the surrounding wood. I did this twice, just to make sure.

Area #1 with 1 coat of 10% Paraloid.

Area #1 with 1 coat of 10% Paraloid.

Area #1 with 2 coats of Paraloid.

Area #1 with 2 coats of Paraloid.

Notice that it really discolours any leather that it comes into contact with.

Area #2 with 2 layers of 10% Paraloid.

Area #2 with 2 layers of 10% Paraloid.

I then made up a mixture of the micro balloons, with two drops of burnt umber acrylic ink (Daler Rowney). At this point it’s like flour, and adding the paint doesn’t seem to do anything – you can’t mix it up.

Using small metal pots (or glass or ceramic, but not plastic) pour out a little of the 40% Paraloid, and add the micro balloons and acrylic slowly, stirring all the time. For the first test I made up a thick putty-like mixture:

Putty-like mixture.

Putty-like mixture.

This I scraped onto the boards with a small spatula, pressing it down into the holes – like using Polyfilla. It did not look great, and the solvent evaporated so quickly that it became really stringy and difficult to work – sticking more to the spatula than the wood.

Filling holes with the putty-like mixture.

Filling holes with the putty-like mixture – area #1.

So I thinned it down, by adding a splash at a time of the 10% Paraloid solution, until the filler was the consistency of double cream. This needs constant stirring, as the mix tends to separate into the balloons on top and the solvent underneath – kind of like a horrible scum/foam!

Thinner filler mix

Thinner filler mix

Using the pointy end of the spatula, I was able to dribble this mix into the areas to be filled, agitating slightly to make sure of an even coverage. Leaving the filler raised above the surface of the wood to be sanded/cut down later.

Area #2, filled with the thinner mix.

Area #2, filled with the thinner mix.

When semi-dry, I was able to scrape off the top layer, so the fill was about level with the surface of the board, and then re do the process after it had completely dried, as the fill had shrunk very slightly. The end results of both areas #1 and #2 were sanded down with fine grit sandpaper.

Area #2 after treatment.

Area #2 after treatment.

Area #2 after treatment.

Area #2 after treatment.

Area #1 after treatment.

Area #1 after treatment.

Area #1 needed some further fills after sanding down, as there were still some voids. I did this with the thinner mixture, and sanded again afterwards.

Area #1 after second treatment.

Area #1 after second treatment.

This type of treatment has worked really well for these small holes, I have yet to experiment with the solvents (ethanol/acetone) to remove the filler residue from around the holes. But if that works, then the fills can be tidied up a lot easier, and will cut down on the amount of sanding the fills need.

Wooden Board Infilling pt. 1

I’m currently working on a few large bindings, one of which has wooden boards that have become a feast for woodworm. All along the joint edge where I’ve uncovered the board by removing the previous deteriorated red rotten reback leather, there’s evidence of quite a lot of insect damage. The wood has become crumbly and needs to be strengthened, consolidated and filled before the boards can be reattached to the textblock and it has a new re-back.

Joint Edge of Back Board

Joint Edge of Back Board

After some research and consultation with PZ trainee Gwendoline (who has infilled wood in a previous project) I decided that the wood should be consolidated with Paraliod B72 before being filled. This will prevent seepage from the infill into the wood and reduce any damage from the infill material.

To make up the Paraloid solution you will need:
–  a clean glass jar with a tight fitting lid, large enough to take 100ml solution
– an accurate measuring flask
– an accurate set of scales
– Paraloid B72 ‘beads’ (suppliers below).
– Acetone
– Ethanol
– cheesecloth
– string
– permanent marker
– extra jam jar.

To make up a 10% solution follow these instructions:

– Weigh out 10g of Paraloid and fasten into a bag using the cheesecloth and string.

10g Paraloid

10g Paraloid

Paraloid and cheesecloth

Paraloid and cheesecloth

Paraloid in cheesecloth 'bag'

Paraloid in cheesecloth ‘bag’

– pour 100ml water into your clean glass jar and mark off where the liquid comes to with a  marker. Then pour out the water and dry up the jar.

100ml marked off.

100ml marked off.

-Measure out 85ml of Acetone and pour into a seperate clean jar. The measure out 15ml of Ethanol and pour into the same jar.

– Place the bag of Paraloid into the clean jar and then carefully fill up with the Ethanol/Acetone mix to the marked line and discard the rest.

– Lift up the bag so it’s suspended in the sovent leaving the string dangling outside and then screw up the lid tightly.

Paraloid suspended in solution.

Paraloid suspended in solution.

– Leave to dissolve overnight, then discard the cheesecloth and string, squeezing out whilst wearing gloves.

Pulp Infilling for Boards

As a continuation of the Bible project, I’m going to dedicate a post specifically to preparing and using paper pulp for infilling the loose board, along the joint edge. At the end there’s a list of suppliers.

Board edge before

Board edge before

First, I removed all the cruddy adhesive from along the joint, without the addition of any moisture – this meant that small bits of the board came away too, and also I made sure that I removed any bits that were weakly attached.

Then I split the board, not much – only by about 5-7mm, and inserted pieces of thick Hahnemuhle paper (180gsm). Several pieces were easier to handle than one strip. Theses were adhered into the split with a thick and dry WSP, and pressed lightly between thin sheets of plastazote (as we have no felts in the studio). This will be used to support the pulp.

Split board with Hahnemuhle.

Split board with Hahnemuhle.

Then – to prepare the pulp. We’ve got a few sheets of paper pulp in the studio which Lizzie got when she went on one of Alan Buchanan’s courses, however, I’ve found some that’s supplied to be used for leaf-casting from PEL.

Paper Pulp Sheet

Paper Pulp Sheet

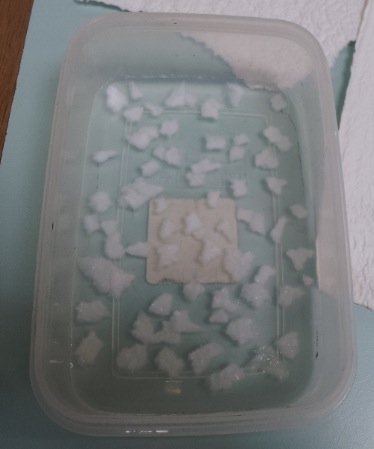
Tear this up into small pieces and soak for about 20mins in water, then drain and replace water with thinned paste, and then leave to soak for another 20mins, the pieces will have swelled, and now be saturated with paste.

Torn pieces in water.

Torn pieces in water.

Torn pieces in thin paste.

Torn pieces in thin paste.

Prime the areas to be filled with a smooth WSP (un-thinned) and then squeeze out the excess moisture from small amount of pulp at a time. I like to take some out and leave in a tea strainer over the main tray – then use this to get rid of any excess water/paste. Then work small amounts along the edge of the board, making sure to press into the contours, and smush it together as much as possible, don’t worry about going outside your guide lines, as it can all be trimmed and sanded later. Smooth down the pulp infill with a finger, squidge down some blotter (over holytex) to remove some excess moisture, and leave to dry, possibly for a day and night (this one is still damp the next morning) . The pulp will shrink, and this process may need to be repeated a few times before there’s enough to work with.

First infill - still very very wet.

First infill – still very very wet.

Once you’re happy that there’s enough pulp (it may be a good idea to put too much on just in case), and that it’s completely dry you can start shaping it.

Trim back the paper support and the infill if necessary, then, using fine grit sand paper to smooth out the lumps and bumps – however, since the pulp is made of pieces of paper, rather than actual mush, the infill itself will turn out a bit lumpy. Sand down the board edge so it’s straight, and round the corners and edges making sure the faces and edges are even and as smooth as possible.

Infill after 2 layers of pulp, trimming, sanding and shaping.

Infill after 2 layers of pulp, trimming, sanding and shaping.

I would then recommend that the infill was covered with a toned piece of Japanese paper to blend it into the board – and this will even out the lumpy nature of the pulp a bit further. I had a piece of 25gsm that had been toned (with acrylic inks) for a previous project that was perfect – so I used this.

20140718_172211

and Voila! Infill is done – more pictures to follow when I come to reattach it, once we’ve figured out how!

Any questions or comments welcomed, and I’ll do my best to answer you.

Pulped Paper – https://www.preservationequipment.com/Store/Products/Conservation-Materials/Paper-$4-Board/Paper-Pulp

King James Bible. 1630. Paper and board repair.

The book of common prayer, along with the loose first section were removed from the textblock, after it was decided that the front board should also be removed. This provided a small amount of access to the spine of the text-block, and meant that the damaged joint edge of the front board could also be treated. The leather along the crude stitching was already so broken, that it only need a small amount of persuading before it came free. The joint edge of the board was then humidified with a damp blotter/Sympatex sandwich, and flattened.

Front board joint edge before treatment.

Front board joint edge before treatment.

Front board joint edge after humidification and flattening.

Front board joint edge after humidification and flattening.

The thick layer of adhesive along the front joint proved problematic, as we were unsure what it was. It did not soften in water or various solvents (acetone, isopropanol or methanol), but it did have to be removed – as it was severely restricting the flexibility of the front joint. We decided that the mechanical method was the most effective, and the residue was chipped and scraped off. After some consultation with the Leather Conservation Centre, bitumen was ruled out as an adhesive, since it wasn’t slightly tacky. A sample of the adhesive was sent to the Conservation department at Camberwell College of Art for FTIR testing, which concluded that it was protein based – suggesting that once upon a time it may have been an animal glue. We still don’t have a definitive answer. We would welcome any suggestions though!

Adhesive along the outer joint, before.

Adhesive along the outer joint, before.

Adhesive remove from the outer joint.

Adhesive remove from the outer joint.

Before any repairs could take place, the loose leaves and first section had a poultice of WSP applied to remove the thick layer of animal glue along the spine edge. This freed up the pages, enabling them to be humidified in a cedar wood cabinet. Some pages were washed, to give them added strength. None of the pages were lined, although in hindsight, this may have been a better option, as a large percentage of the pages needed to be covered anyway for the repairs.

Poulticing the spine folds.

Poulticing the spine folds.

After the animal glue was removed, two stitched pamplets were discovered. Unfortunately they had been incorrectly collated, and after discussion with the owner, it was decided that they should be repaired back into the correct order. This meant that the prayer book was now in the correct order, and was only missing 2-3 pages.

Uncovered stitches

Uncovered stitches

Paper reapirs were carried out using a toned (with acrylic inks) 6gsm Japanese paper on the verso, adhered with Cellugel. Using Cellugel was prefered as it did not add any moisture that could cockle the very thin paper or affect any iron all ink present (the pages with iron gall in weren’t washed or humidified), it also dries very quickly; greatly reducing treatment time, and could be applied through the tissue without damaging it.  Infills were completed using a toned (with acrylic inks) 16gsm Japanese paper adhered with a 5% gelatine adhesive.

Paper repairs, after.

Paper repairs, after.

The damaged map (pictured below), was slightly trickier to repair as it didn’t have a corresponding section to wrap around and therefore couldn’t be spaced accuratly. Instead, I used the adjoining section as a gauge and kept the two sides of the map in place using paper clips. There were fragments of the map stuck in the gutter, and the jigsaw approach was employed and then spaces were filled with toned 16gsm japanese paper.

Damaged map before treatment.

Damaged map before treatment.

Damaged map after treatment.

Damaged map after treatment.

Next step is to sew back in the loose sections. Check back soon!

King James Bible. 1630. Introduction.

This fantastic project came to PZ from a private client via Graham Bignell in London. It is an early edition of the King James bible, with an additional book of common prayer and biblical family trees.

IMG_9871

At some point in its life its had lots of previous repairs; patches – sewn and pasted, new brass plates, an over back, and a very crude board reattachment. The front joint repair was particularly interesting: presumably, after the insertion of the prayer book and accompanying pages, the front joint has failed, but rather than just the leather splitting, the board has broken as well. The board was then reattached with large stitches and the application of a thick layer of insoluble adhesive.

IMG_9868

The spine is also severely distorted, and a large amount of animal glue has been squeezed down into the void between the text-block and the spine leather to keep it all together, restricting the flexibility of the text block, and creating more problems along the front joint.

IMG_9861

The first few sections of the text-block are suffering from various types of paper damage, including losses, tears, creases as well as being stuck together with large amount of animal glue.

IMG_0577

After speaking to Fred Bearman, a bindings historian about the provenance of the binding, and discussing treatment options, a detailed condition report was assembled, as well as various treatment options. It is a family bible, and the blank pages have been used to record an extensive family tree, so these were the areas that would need to be accessed, requiring the binding to be opened and used.

Therefore the front joint needed to be addressed, as well as the state of the paper throughout the binding. There was nothing to be done about the shape of the spine, since the binding would have to have been pulled to access the spine, and this was considered far too interventive.


The main issues to tackle through treatment were:

  • Weak and damaged pages at beginning and end of textblock.
  • Poor opening characteristics, especially the front board.
  • Severe damage to front joint.
  • Split and broken front board.
  • Textblock break.
  • Damage to oversize tipped in page.
  • If possible – reduce the thick layer of adhesive in the spine hollow.


Treatment has just begun, so check back for progress updates and photos.


Pilots Flying Logbook.

This project came from a contact of Lizzie’s in London, and belongs to a private client. The clients specially asked for the binding not to be changed very much, as it’s aesthetic quality was of sentimental importance to them. The notebooks form a detailed account of the Pilots flights between 1920 and 1936, recording distances, weather, types of aircraft flown and additional comments.

IMG_9722

It is a composite binding, comprising of two single section stapled pamphlets and two cloth backed multi section notebooks. They have all been adhered together to form a larger notebook – with additions happening at different times. There had been a spine piece covering the two pamphlets and one of the notebooks, and then the second notebook adhered after, with strips of cardboard stuck across the head and tail of the spine to keep it all together.

IMG_9717

Condition:
The staples in the two pamphlets were rusting, and causing damage to the surrounding paper. The strips across the spine were damaged, with tears and losses. The front cover was scuffed around the edges, and the body of the back notebook was barely attached to its front board, and became fully detached after gentle handling.

Treatment:
The thick paper covering the spine was removed from between the two notebooks, giving access to the spine edges of the pamphlets. The staples were removed, and paper repairs carried out with toned japanese paper adhered with WSP. A piece of toned aerocotton was used to strengthen the back of the first notebook, this also was used to reattach the pamphlets. The single sections were then sewn up with  a pamphlet stitch using the holes left by the staples, through the aerocotton.
Another piece of toned aerocotton was used to cover the back notebook, repairing the textblock split. this was reinforced with small stitches at head and tail, which were then covered with the repaired strips. The inside of the split was repaired with toned japanese paper and WSP.
The strips at head and tail were then repaired with toned japanese paper (where there were splits and tears) and toned manilla was used for infills.
The edges of the covering board were consolidated with WSP.

IMG_9803

IMG_9808

History of Europe

I’ve started work on a binding Lizzie found for me that I can use as a practice piece for parchment repair. Since I’ve done repair with caecum before, I decided to use a different repair method, and since this way (with Japanese paper) is also popular with conservators, it followed nicely on from my MA research. Someone had started work on the project – removed the pastedowns, tried to treat the parchment damage, and lined the spine, so there were a few issues that I had to address before starting work on the parchment covering.

Spine edge before treatment.

Spine edge before treatment.

Inside the case before treatment.

Inside the case before treatment.

I first started by removing the spine linings, mechanically as much a possible, and then with a poultice of SCMC – it seemed to have been adhered with EVA. I then repasted the spine with WSP, adhering a layer of aerocotton in the place of mull, which I would use as a board attachment method, as well as sewing new endpapers to it. I then sewed some endbands in a neutral colour and a dusky red to match the text-block edge colouring. The spine was lined again, with 130gsm Hahnemuhle which was sanded back to even out the lumps from the thread of the endbands and the new endpapers, and then another lining of the same was added on top – all adhered with WSP.

In the midst of this the first few pages with severe stains were blotter washed in-situ which you can see in my earlier posts.

I relaxed the corners of the boards using a damp blotter/Sympatex sandwich and then repaired  and consolidated them with WSP and toned 16gsm Japanese paper. These were then left to dry under pressure – helping to negate the warp of the boards simultaneously.

Holly had done some parchment repair earlier on last year, and advised me on her techinique – which is what I’m trying out today; building up layers of thicker Japanese paper (specifically Tosa Shoji 54gsm) in combination with toned Usu Mino 16gsm and toned Kizuki Kozo 6gsm. The papers were toned with acrylics as watercolours fluffed up the paper fibres too much, and acrylics gave a more even finish. The toned paper was left to dry, then rehumidified with a spray and pressed tightly between polyester sheets to give it a smoother surface to match the parchment.


TBC

Blotter Washing

There are a few posts and articles out there about blotter washing for loose sheets and prints etc, but none that I’ve found for washing pages of bindings in situ. So, to remedy this, I’ve put together a post for what I’ve done for a project I’m working on at the moment.

I’m pulling the staining out towards the verso of the page, unless there’s a plate on the verso, in which case, the stains will be pulled out onto the recto. The technique uses osmosis – pulling moisture through the page from a wet blotter to a dry one, and requires the dry blotter being changed regularly so it can receive more moisture and therefore soluble particulates from the stained page.

The page to be washed will need to be humidified before treatment, I’ve done this with a handheld Muji spray bottle, protecting the facing page with some cling film.

Using thick plastic sheets as a barrier between the page to be washed, and the rest of the text block, set up the process as follows:Blotter Washig

1: Weight.
2: Glass sheet (mine’s from Ikea).
3: Wet blotting paper, cut to the same size of the page to be washed.
4: Page to be washed.
5: Dry blotter, cut larger than the page.
6: Thick polyester sheeting, or Melinex (something waterproof).

Change out both pieces of blotting paper regularly (every 15-20mins) and you will be able to see the discolouration coming out onto both pieces of blotter, but more so on the dry piece. Change the blotters 2-3 times depending on the severity of the soiling, and then place the page between clean, dry blotters and leave to dry under weight (changing these blotters too).

Check out some before and after’s after the jump.

Continue reading

Cornwall Archive Network & PZ Training day pt. 2

Both training days went down really well, with participants mentioning that they really enjoyed doing some practical work, and it was a nice change from watching a presentation.

Redruth

Redruth

I structured the day very similarly to the course I attended at the Bodleian, with an introductory presentation describing the background and development of the fascicule system before the practical session started, so that the participants knew what they were aiming for. I had also prepared some Blue Peter style step-by-step examples as well as a few filled fascicules to show the desired outcome. Each participant got a blank fascicule that I had made back at the studio, as well as a selection off cuts of different types of paper to hinge in and some mocked-up “problem” cases. The first half of the morning I demonstrated how to attach the Japanese paper hinges to the items, and then how to attach hinges to the “problem” items. After lunch we prepared the items for hinging in, arranged them in the correct order and then adhered them to the fascicule with a dry WSP. Holly then explained how to insert a multi-page pamphlet, by sewing it to a folded page. Sam, Holly and I were around all day for advice and gave answers to any questions they had.

Bodmin

Bodmin